We had Spring Break this past week and had planned on taking an 8-day driving trip to Oregon to see friends and visit some college campuses.
Instead, a stomach virus hit the house and I canceled everything. By mid-week we were feeling better and decided it was time to tackle a painting project in the playroom that the kids and I have wanted to do for about 4 years.
When we moved into our current home, we were super thrilled that it had just been fully painted, inside and out. The walls were a nice neutral and everything was move-in ready.
The color wasn’t exactly something I would have picked out on my own but I liked it plenty and it worked well with our furniture and somewhat-minimalist style.
After 4 years, though, the walls have started to get dingy with fingerprints and normal family life wear and tear. The kids have each painted their bedrooms, and I had wanted to redo the playroom walls but lacked the motivation to do it on my own.
So when we were all home and housebound over Spring Break, Adam and I dug through our gift cards and found that we had quite a bit of money on cards from Home Depot and Orchard Supply Hardware.
The girls and I watched a Fixer Upper episode where they painted a playroom in “ombre” style and really wanted to give it a go — so we did!
Here is the “Before” of our playroom:
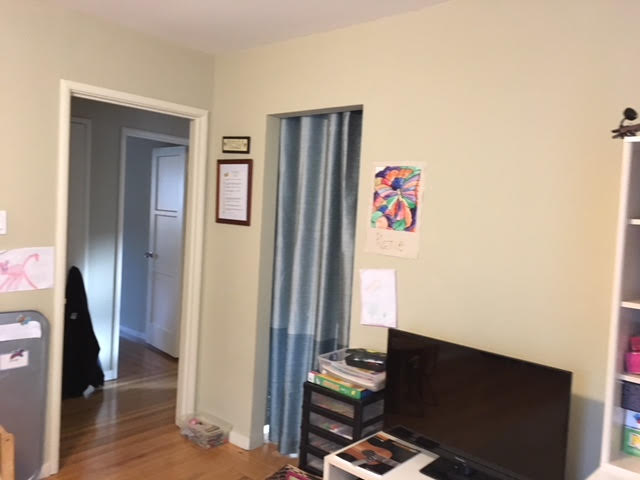
The room is completely and totally functional — it just lacked a bit of style and personal preference.
The kids picked out three blue hues — which took a VERY LONG TIME for us to agree upon. Some people buy little samples to take home to try out on their walls before committing to a color for ever and ever.
That’s not what happens in the O’Dea family. 😉 We are sort of All or Nothing kind of people… 😉
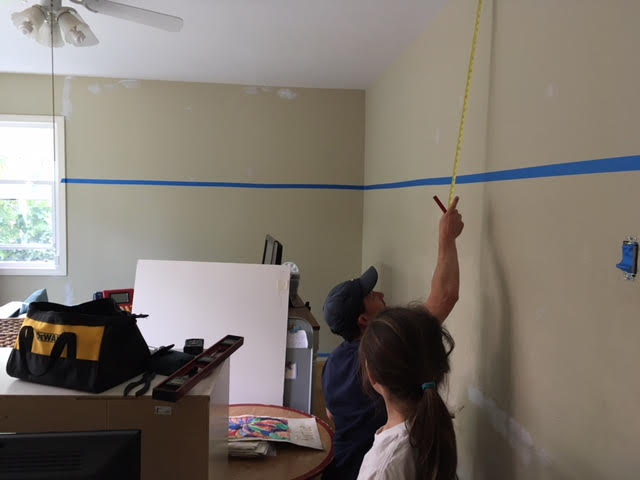
One of the best things about conducting this project over spring break when we were supposed to go on a vacation is that Adam was off work. I know that the girls and I could have figured out how to measure and make everything level on our own, but we were happy to pass that task on to Adam…
FYI: that is not sexist. that is using your resources wisely….
#nojudgement
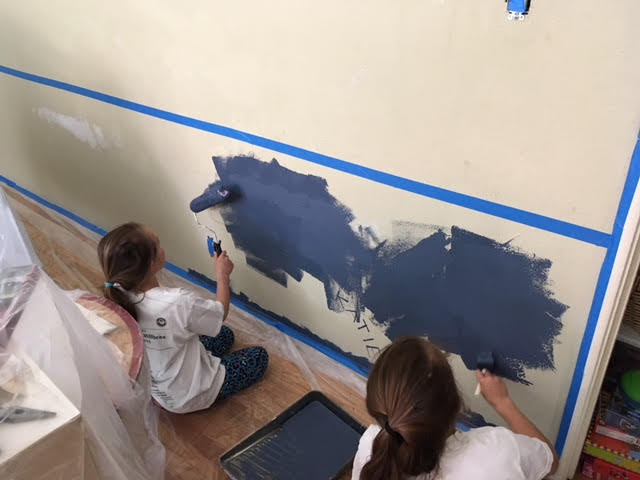
The girls started off painting down low while I did the top section. I do have three daughters, BTW….
my oldest is 16 1/2. She did not help. At all.
#againnojudgement
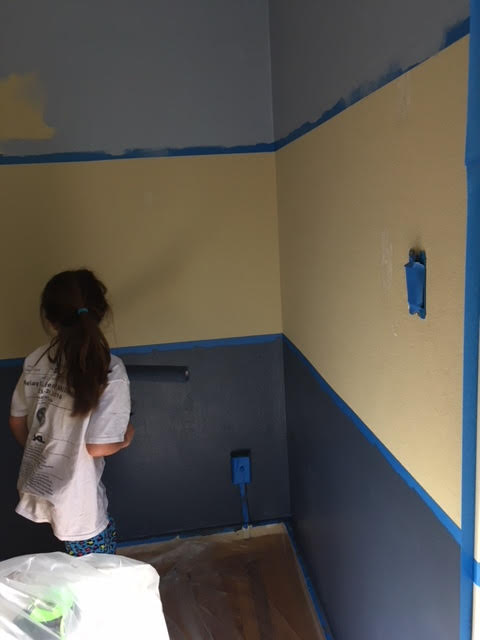
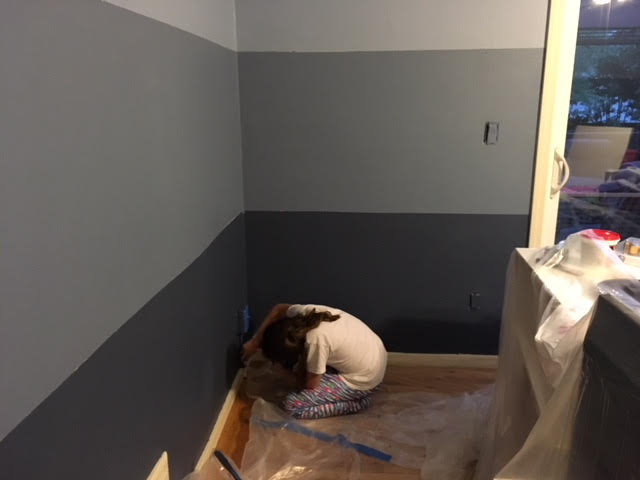
We went through A LOT of Painter’s Tape. (note to self: buy stock in 3M products…) Adam guesses we went around the room 6 times…
One of the biggest projects was that Adam installed crown moulding in the room. I don’t seem to have remembered to take any photos during the installation.
#oops
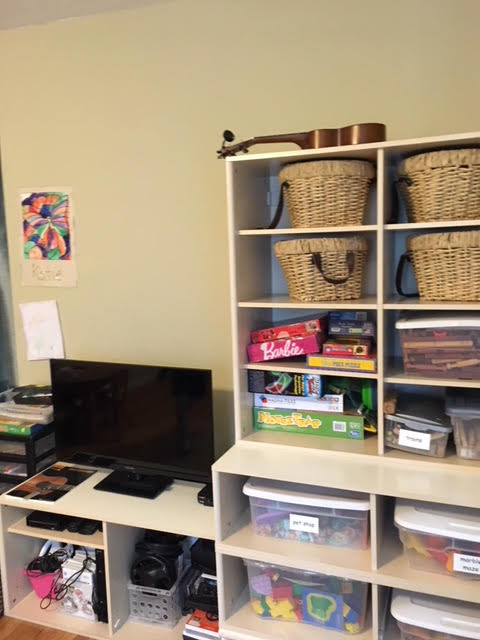
And here is the finished project:
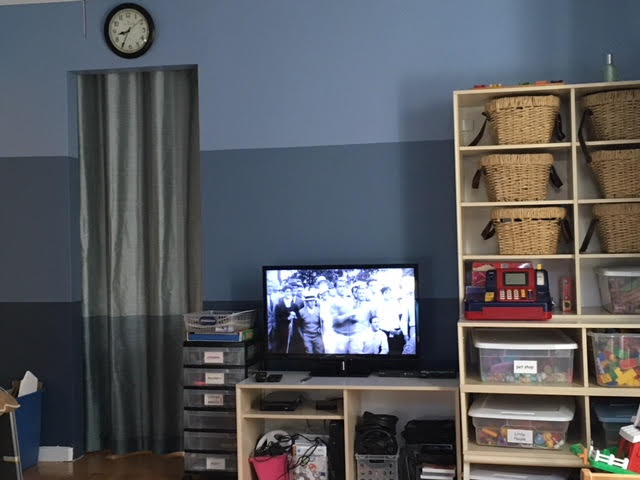
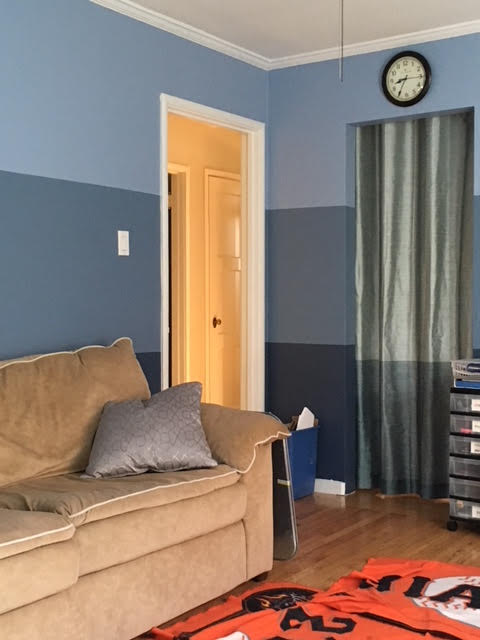
The colors we chose were from BEHR — and they are (from top to bottom):
Journey’s End S520-2u
Jean Jacket Blue S510-4m
Durango Blue S510-6d
I could not be any happier with the color choices — the room looks much larger and has a calm and peaceful vibe. The bright white moulding and trim really makes everything pop and now I want to go through the rest of the house and update the trim and walls.
Fun stuff!
So, since we didn’t go away on an 8-night vacation, and we had giftcards for the Home stores, and we did everything ourselves, I decided just now that I
(I could say we but we all know who the puppet-master is in these sort of situations..)
saved us about $4700.
YAY me!! 🙂


3 Comments
Luv the room changes and the colors are my favs. GREAT JOB!
Great job! May you have many happy family hours there.
Are you sure the bottom color is Durango blue? It looks much darker than I thought.